Filtering by Category: knowledge base

"Nagoshi No Oo-Harae" Shinto Summer Purification

Added on by the ikebana shop.

The "Nagoshi no Oo-harae" 夏越の大祓 (Summer Purification) is a Shinto event held near the end of June. It is a sort of a mid-year reset where all of one's bad luck and impurities are driven out, getting us ready for the 2nd half of the year.

The Shinto priest waves around this wand called "oo-nusa" (大麻) to drive away bad luck, illness and calamity. The wand is made from a branch of the sakaki (榊) tree [cleyera japonica] with "shide" (紙垂) paper streamers attached.

"Chinowa Kuguri" 茅の輪くぐり

At the entrance of the shrine, there is a ring made of entwined thatch. You walk through this 3 times before moving onward into the shrine. This action drives out the bad luck and illnesses that have attached to you. Before stepping through, you bow each time. First, walk through, then turn left and back out. Second, turn right and out. Third, turn left and out. Fourth, walk straight through and into the shrine. Notice that by doing these steps, you drew a number "8" or infinity symbol.

"Kata-shiro" 形代

At the shrine, you can get these paper dolls called "hitokata-shiro" (人形代). They work like reverse voodoo dolls. 😊 You write your name on it; blow a breathe into it; and rub it gently on your body. Then you offer it up to the shrine. They will be burned later. What's happening is that you are transferring all your bad luck, illnesses and impurities onto the paper doll and leaving them for the gods to sort out!

Now, you're ready to face the 2nd half of the year!

Photos are from Hikawa Jinja (氷川神社)in Omiya, Saitama Prefecture.
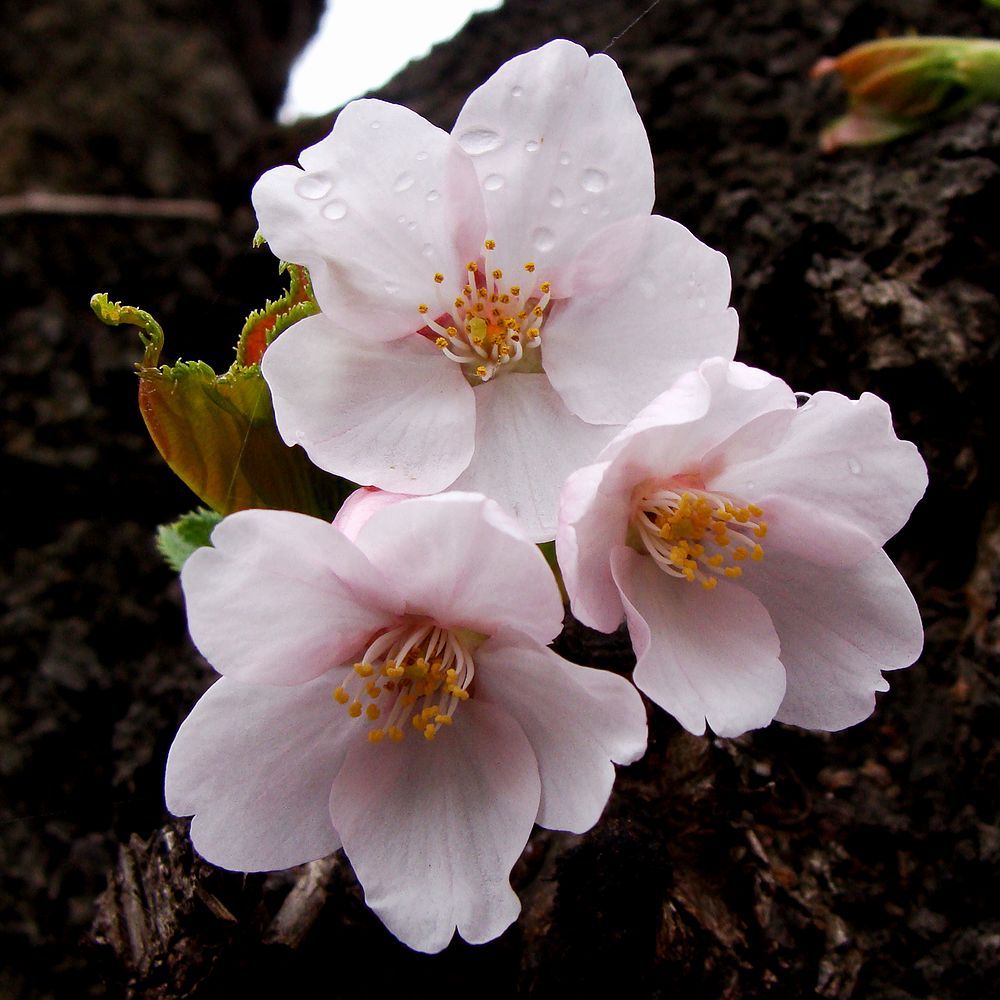
Sugidama

Added on by the ikebana shop.

If you’ve ever visited a sake brewery in Japan, you would have seen these spheres of leaves hanging by the entrance. They are called sugidama (杉玉) and are made with the leaves of the sugi tree (commonly called “Japanese cedar” but more correctly, “cryptomeria”).

Sake brewery entrance.

The sign says: “God of Sake, Miwa-Myojin.

Traditionally, the sugidama leaves come from the cryptomeria trees growing in the Oomiwa Shrine (大神神社) in Nara Prefecture. The shrine is located on Mt. Miwa, the sacred mountain where Miwa-Myojin (三輪明神), the god of sake, resides. Sake breweries display the fresh sugidama when the first batch of sake is pressed. So, a green sugidama announces that fresh sake (like shiboritate) is coming. In time, they will turn brown…and that may be the sign that the aged sake (like hiyaoroshi) are ready!

Nowadays, when you see a sugidama outside an establishment, it means sake is brewed, sold, or served there!

Niigata Prefecture is one of the places in Japan famous for its sake. You can visit a brewery for a guided tour. One place that gives brewery tours (and tasting in the end!) is the Imayo Tsukasa Sake Brewery (今代司). This brewery was founded in 1767. Guided tours in Japanese are free. The English tour costs 400 JPY (as of Jun 25, 2023). More info here.

Imayo Tsukasa Sake Brewery

The traditional vats are also made from sugi wood.

Bonus pics. A display of Niigata sake at Nagaoka Station.

Sake barrels.

Mamebon - Tiny As A Bean

Added on by the ikebana shop.

To those who like miniature things, we’d like to introduce our hand-made “mamebon” 豆本!


豆 - mame ==> "bean"
本 - hon (bon) ==> "book"


We made these notebooks. They are “as tiny as a bean”!

Write your snippets of thought in them. A mini journal perhaps? Have fun!

There are other Japanese words that use “mame” to mean something small.

“Mame chishiki” 豆知識. “Chishiki” means “knowledge”. So “mame chishiki” would usually refer to some trivia or fun fact.

And, “mame kenzan” 豆剣山 is a small kenzan!


Recipe: Matcha Squares

Added on by the ikebana shop.

This is a very “rough” recipe to make matcha squares. Good luck!

Ingredients:
butter 1/2 cup
3 eggs
white sugar 1 cup
brown sugar 1/4 cup
vanilla extract 1 tsp
all-purpose flour 1 cup
matcha 2 tbsp
salt 1/2 tsp

8” x 8” oven pan, parchment paper

Procedure:

  1. Melt and stir the butter.

  2. Mix eggs, sugar (both) and vanilla in a mixing bowl. Beat with whisk until it’s thick.

  3. Add in the butter.

  4. Sift and mix in the flour, matcha, and salt.

  5. Stir with spatula. Keep stirring until it becomes very smooth.

  6. Put in an 8” x 8” pan. (Put parchment paper underneath to prevent sticking.)

  7. Bake in oven at 350℉ (about 180℃) for about 30-40 min.

  8. Use toothpick to check if it’s done!

Enjoy your matcha squares!

Tutorial: How To Make Our Face Masks

Added on by the ikebana shop.

Since completely stopping making face masks in the end of September, 2020, not a day has gone by without customers coming in still looking for them. We truly appreciate that they sought us out, most mentioning that our masks were “the best”. Thus, it made us all the more sad to disappoint as we had no more masks to offer. With life in our Atlantic bubble moving along, it just wasn’t possible to continue making them.

To those who are handy with the sewing machine and would like to make their own masks, here is a little tutorial to help you get started. We have replenished our Japanese fabric stocks and have a lot of fat quarters to offer. (What is a fat quarter?)

Special Limited Offer: When you purchase fat quarters at the shop, do let us know if you are planning to make masks out of them. For each purchase of our fat quarter fabric, we will throw in 1.5m length of the elastic cord for FREE. This offer is good while supply lasts.

Let’s get started!

This tutorial will help you make a double-layered, pleated face mask with approximate dimensions of 18cm x 9cm. The choice of fabric material is really up to you. We went through a lot of trial-and-error to choose what we thought was best. We used 100% cotton fabric on all our masks.

0. Materials

  • 2 pcs fabric cut 18cm x 19cm
    (One piece will be the front and the other will be the back. You can use the same pattern for front & back too. The masks will be reversible.)

  • 2 pcs fabric cut 12cm x 5cm
    (These will be your bias strips so we recommend the pattern to be the same as the front pattern of your mask)

  • 2 pcs elastic cord 28cm length

Fig 1 Mask materials

1. The Mask Body

  • Place the 2 big fabric pieces one on top of the other with the “front” of each fabric inside, i.e not showing. (Basically, this is the mask inside-out.)

  • Make sure they are aligned flush.

  • Stitch together along the top & bottom edges with a 0.5cm seam allowance.

Fig 2 Stitching the mask together.

2. Pleating

  • Turn the mask back to its normal position so that the seam allowances are now in the inside. (i.e. no longer inside-out)

  • Put marks on both side edges of the mask on the appropriate places as shown in Fig 3.

  • Fold the mask (both layers together) across on each of the marked points. Iron the creases to make them more prominent. (Fig 4)

  • Use sewing pins to keep the creases in place. (Fig 5)

  • Stitch across the creases at about 0.5cm from the mask edge on both sides. (Fig 6)

Fig 3 Marks for pleating

Fig 5 Sewing pins to keep creases in place

Fig 4 Make creases on the marks

Fig 6 Stitch the creases together

3. The Bias Strip

  • Take the smaller piece of fabric and put it under the mask. Make sure both are front facing. (Fig 7)

  • Align the smaller piece flush along the side edge of the mask. Place it centred vis-a-vis the top-bottom edges of the mask.

  • Fold both the protruding top & bottom excess fabric towards the mask and stitch them together all the way down. The stitching should be at about 0.5cm from the mask edge (more or less on the same line as the stitching for the pleats). (Fig 8a & 8b)

  • Pull out the bias piece as shown in Fig 8c.

  • Fold the bias piece two times as shown in Fig 9a & 9b.

  • Stitch the bias piece in place. Do the same for the other side. (Fig 10)

Fig 7 Placing the bias strip

Fig 8a Sewing on the bias piece

Fig 8b Bias piece is sewn on

Fig 8c Pull out the bias piece

Fig 9a Fold

Fig 9a Fold

Fig 9b Fold again

Fig 10 Stitch the bias strip

4. The Elastic Cord

  • Use a needle or bodkin to thread the elastic cord through the bias strip. (Fig 11)

  • Tie the cord together and hide the knot under the bias strip. Do it on the other side too!

Fig 11 Threading the elastic cord

And there you have it!

Fig 12 Face mask completed!

Extra notes:

  • For cotton face masks, we recommend washing in cold water and hanging to dry. Putting it in the dryer may cause shrinking.

  • The recommended length of 28cm for the elastic cord should be more than enough. You can always shorten it if it’s too loose. It’s harder to loosen it up if it is too tight!

We hope this helps. Stay safe!

Plum Vs. Cherry

Added on by the ikebana shop.

Both the plum (ume) and cherry (sakura) blossoms feature prominently in Japanese fabric and print patterns.  Can you recognize which ones are the plum blossoms and which ones are the cherry blossoms? 

IMG_7256.jpg

The plum blossom is much revered by the Japanese.  It blooms in February to early March; that is, around the time when winter is not quite over yet.  Only a strong flower can bloom in the bitter cold of winter and therefore, the plum blossom is seen as a symbol of strength and fortitude.  Together with pine and bamboo, the plum is one of the Three Friends of Winter (shochikubai 松竹梅)  It is also the true harbinger of spring.

The cherry blossom is probably the most loved flower in Japan.  It blooms in late March through April.  Once blooming, the flowers last for only about a week.  During this very special time of year, Japanese people come out and celebrate the blossoms with hanami (flower viewing) parties.  There is a carpe diem element to this, a celebration of impermanence in the Japanese psyche.

Plum blossom.By Kakidai (Own work) [CC BY-SA 3.0 (https://creativecommons.org/licenses/by-sa/3.0)], via Wikimedia Commons

Plum blossom.
By Kakidai (Own work) [CC BY-SA 3.0 (https://creativecommons.org/licenses/by-sa/3.0)], via Wikimedia Commons

Cherry blossom.By あおもりくま ( Aomorikuma ) - 青森市 合浦公園, GFDL, https://ja.wikipedia.org/w/index.php?curid=1419326

Cherry blossom.
By あおもりくま ( Aomorikuma ) - 青森市 合浦公園, GFDL, https://ja.wikipedia.org/w/index.php?curid=1419326

So now, back to our question: how does one distinguish between the plum and the cherry?  
The key is to observe the petals.  The plum has round petals.  The cherry has indented petals.  
Simple as that!

Plum blossoms on fabric.

Plum blossoms on greeting card.

Plum blossoms on chiyogami paper.

Cherry blossoms on fabric

Cherry blossoms on greeting card.

Cherry blossoms on chiyogami paper.

Now you know! 

Extra trivia....
Cherry blossoms are depicted in the 100-yen coin!


Japanese Calligraphy: To See A World...

Added on by the ikebana shop.

Original Japanese calligraphy by Yukari Haverstock. It's the Japanese translation of an excerpt from William Blake's "Auguries Of Innocence".

To see a World in a Grain of Sand
And a Heaven in a Wild Flower
Hold Infinity in the palm of your hand
And Eternity in an hour.


ひとつぶの砂に ひとつの世界を見 
一輪の野の花に ひとつの天国を見 
手のひらに無限を乗せ 
ひと時のうちに永遠を感じる。

IMG_20180225_105001.jpg

Destiny And The 5-Yen Coin

Added on by the ikebana shop.

Most Japanese people believe in destiny. The term "go-en" (ご縁) refers to those seemingly serendipitous encounters that result in long and meaningful relationships.   It would often mean a bond between people but it could also refer to connections with objects (like a house, a painting, or even a favourite teacup!) or a calling.  Ask people how their career started, how they met their partners or how they found that perfect piece of furniture.  Most answers would probably boil down to a mixture of perseverance and luck. Japanese people would say "Go-en ga arimashita." (ご縁がありました。)There was "go-en" involved in the outcome. It was meant to be!

IMG_20171129_091236.jpg

The Japanese 5-yen coin is also called “go-en” 五円.  Because it sounds the same as the “go-en” of destiny, many Japanese people believe that having a 5-yen coin around helps them find what the Universe has in store for them. It could be a soul-mate, a dream job, the perfect house, etc. In shrines and temples, it is also the coin of choice when tossing a token offering into the collection box (賽銭箱 saisen-bako) whilst saying a prayer of thanks and/or a wish for something in the future (in that order). The 5-yen coin helps along the good luck and the serendipity that is actually meant to be!

 
10yen.jpg

Extra trivia: Using a 10-yen coin for your prayers and wishes is not advisable.  Another word for "10" is "toh" (十).  So, the 10-yen coin could be called "toh-en" (十円).  Now, another meaning for the word "toh" (遠) is "far" ...and putting them together as "toh-en", it can be written as "遠縁", which means "far destiny"!  So the 10-yen coin is something that keeps your destiny out-of-reach!


We made a few items to help keep your lucky 5-yen coin handy, always ready to to attract the good luck in!  All hand-made in-house with loving care. Available at the shop while supply lasts.

An origami pouch to keep your 5-yen coin in your wallet or purse.

An origami pouch to keep your 5-yen coin in your wallet or purse.

A crane ornament to display in your home or office.

A crane ornament to display in your home or office.

Introducing Sogetsu Textbook 5

Added on by the ikebana shop.

The Sogetsu School of Ikebana has recently introduced a new textbook, Textbook 5: Technique & Creation, to its curriculum.  Completion of Textbook 5 is now a prerequisite in order to obtain the Teacher's Diploma 4th Grade.  Iemoto Akane Teshigahara and other Sogetsu masters have been conducting seminars for Sogetsu teachers to update them regarding the instruction of Textbook 5.  It is important to note that only teaching members of the Sogetsu Teachers' Association (STA) who have successfully completed the Textbook 5 special training sessions are qualified to teach Textbook 5.

Unfortunately, there has been no opportunity yet for a Sogetsu master to visit Canada (let alone little ol' Halifax!) to conduct a training session.  So this summer, Miyako travelled to Tokyo to attend the Iemoto's seminar at the Sogetsu headquarters!  We are happy to announce that Miyako successfully completed the seminar so all of her students who have finished Textbook 4 may begin challenging Textbook 5!

So what's new with Textbook 5?
The greatest impact of the introduction of Textbook 5 is the standardization of the curriculum on the way to obtaining the Teacher's Diploma 4th Grade.  In the past, after finishing Textbook 4, students needed to take more preparatory lessons before applying for the Teacher's Diploma.  Those lessons fell into a kind of grey area where the content was based on the individual teacher's discretion.  The old system did work in the sense that the teacher was able to re-direct the student's attention to themes that needed reinforcement.  However, the system also resulted in differences in training experience, depending on what one's teacher decided to focus on.  Textbook 5 replaces that "grey area" and provides a standard and solid lesson plan for Teacher's Diploma preparation.

The content of Textbook 5 is described by four key words: "technique", "materials", "placement", and "creation".  Above all of that is the emphasis on self-knowledge.  Only with profound self-knowledge could one uniquely express oneself through ikebana and have the confidence to become another's teacher.

There are many, many things to look forward to in Textbook 5...from new techniques in securing an arrangement in a spherical tsubo vase (if you thought nageire was difficult, think again!) to creating an arrangement from behind.  Textbook 5 also shows us examples of arrangements in situ...i.e. in the the actual locations where the arrangements were meant to be placed.  It gives us fresh ideas on where ikebana can be incorporated in our living space. Indeed, ikebana arrangements are meant to be placed somewhere....not just at a photographer's studio!  Other samples of interesting challenges are the use of mizuhiki (paper cord) for celebratory arrangements and creating ikebana to complement an art work. We will stop here and let you explore Textbook 5 on your own!

Browse through Textbook 5 next time you are in the studio for your lessons and see what you can look forward to!  It is available to students who have completed Textbook 4.  (Please note: We do not sell Sogetsu textbooks to the general public.)

Caring For Your Ikebana Clippers

Added on by the ikebana shop.

For the serious ikebana practitioner, a pair of trusty ikebana clippers is an indispensable tool.  The clippers are an extension of one's hands.  And so, we must treat them like our hands.  If our hands are dirty, we wash them. If our hands are wet, we dry them.  So must we with our ikebana clippers!

Keep the clippers clean.
Stains from plants, sap from branches, etc... they will stick to your clippers. Accumulated dirt and stains will also hamper the functionality of your clippers.  

Clean your clippers after each use. We're not saying that we should emulate the consummate sushi chef who wipes his beloved knife after each slice of fish; but after finishing your arrangement, cleaning the clippers must be automatic.  (So is cleaning up your work area, wiping down the table, disposing of unwanted twigs and leaves, etc for that matter!)

Besides, clippers look prettier when clean!


Keep The Clippers Dry
Most ikebana clippers are made with high carbon steel.  They are tough and could cut thick branches.  But, they are also prone to rust.

After use, you can run some water over your clippers to wash them.  The important thing is to dry them afterwards.  Use a dry towel to wipe off water.  Do not immediately stow them in their case.  Make sure they are completely free of moisture before putting them away. 

If you are not planning to use your clippers in a while, put a sheen of oil over the blades.  Cover every bit of the blades and make sure to put a few drops on the joint and rivets too.  


A very short primer on rusting: water+oxygen on steel = rust! Water is the catalyst for the oxidation process that produces "hydrated iron oxide"...a.k.a. rust!  Oil and water do not mix. A protective coating of oil stops water from seeping through to the steel. It also protects your blades from the moisture found in the air.


You wouldn't this to happen to your clippers!

Don't Forget The Small Towel
When practicing ikebana, always have a small towel for your clippers on the table.  The obvious reason is so that you can wipe the blades clean any time you need to do so.  It also comes in handy to clean up water splashes.  But, there is another equally important reason to have the small towel around.  Every time you need to put your clippers down, place them gently on the towel...never directly on the table.

The towel muffles the sound when the clippers hit the table.  Imagine a roomful of ikebana students, all producing loud clattering noises as they put their clippers down.  It is very distracting and disruptive to the serenity of the class.  Using a towel to soften the noise is a sign of respect towards your teacher and fellow students.  As well, it protects the table from nicks and scratches!

Don't Wiggle!
Did you notice that ikebana clippers have a joint that is a bit looser than those of a pair of scissors or even floral clippers?  Ikebana clippers also do not have an embedded spring grip that limit how wide you can open it. This is because they are made to cut not only flower stems but also thicker branches.  Ikebana clippers are tough and strong.  However, there are limits and if the branch is too thick, then better use a bigger tool like a handsaw to cut it.  Do not twist the clippers left and right in an effort to sever the branch.  This action, done often enough, would loosen the joint too much and damage your clippers.  

Also, avoid using the clippers to cut other things other than plant material.  Unless your clippers have a wire-cutting notch, snipping floral wires is not recommended.


Let The Pros Do It
As with any blade, ikebana clippers will lose their edge in due course. Ikebana clippers have an asymmetrical bevel.  Burr may have to be removed on the other side but actual sharpening should be done only on one side.  Incorrect sharpening will change the original grind and will affect the functionality of your clippers.  If you are not sure how to do it, then just let a professional blade sharpener do it.  And if you need to find one in Halifax, click here!

Cover Up!
We all know that serious ikebana practitioners always have their clippers handy.  A simple clipper cover is convenient and easy to use. It will protect you from injury and your bag's contents from damage.


A good pair of ikebana clippers will last a long time.  Through years of constant use, they will lose their lustre in parts. They might even gain a few hard-to-remove stains.  That means those clippers are slowly getting their unique character and soon they will become like an old friend and trusty companion.  So let's make sure we show our clippers tender and loving care!