Filtering by Category: ikebana

My Ikebana: All Green

Added on by the ikebana shop.

During my recent trip to Japan, I found this flower container at an antique shop and fell in love with it immediately! 

IMG_0212.jpg

Today's material consisted of all greens--myrtle, salal and alder.  WIth a green container as well, how could I make the arrangement interesting?   

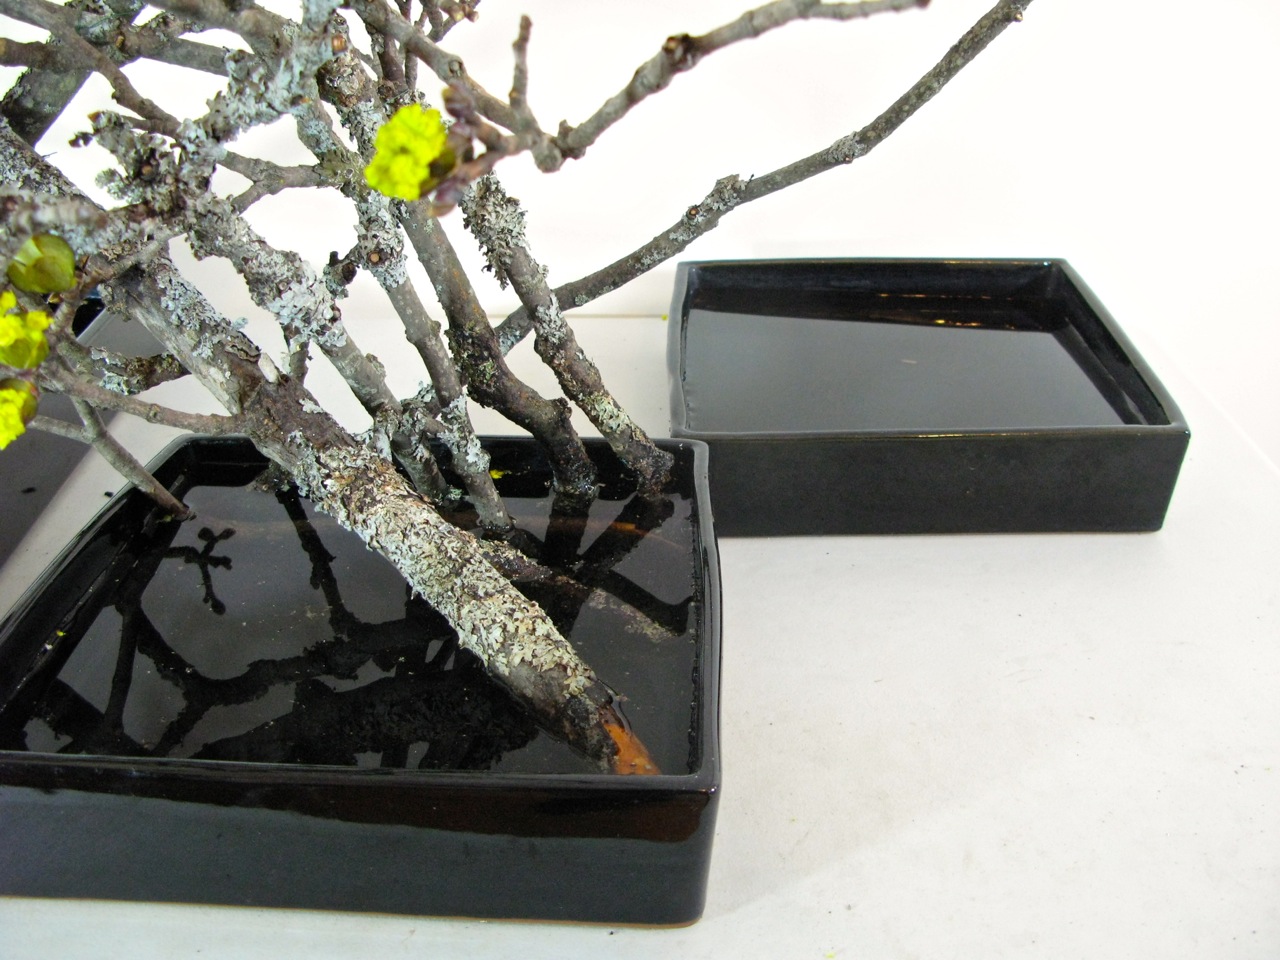
I put the the berry-bearing alder branches near the mouth of the container and tightened the structure with salal.

IMG_0214.jpg

Then I extended two myrtle branches outwards to provide lightness.

IMG_0210.jpg

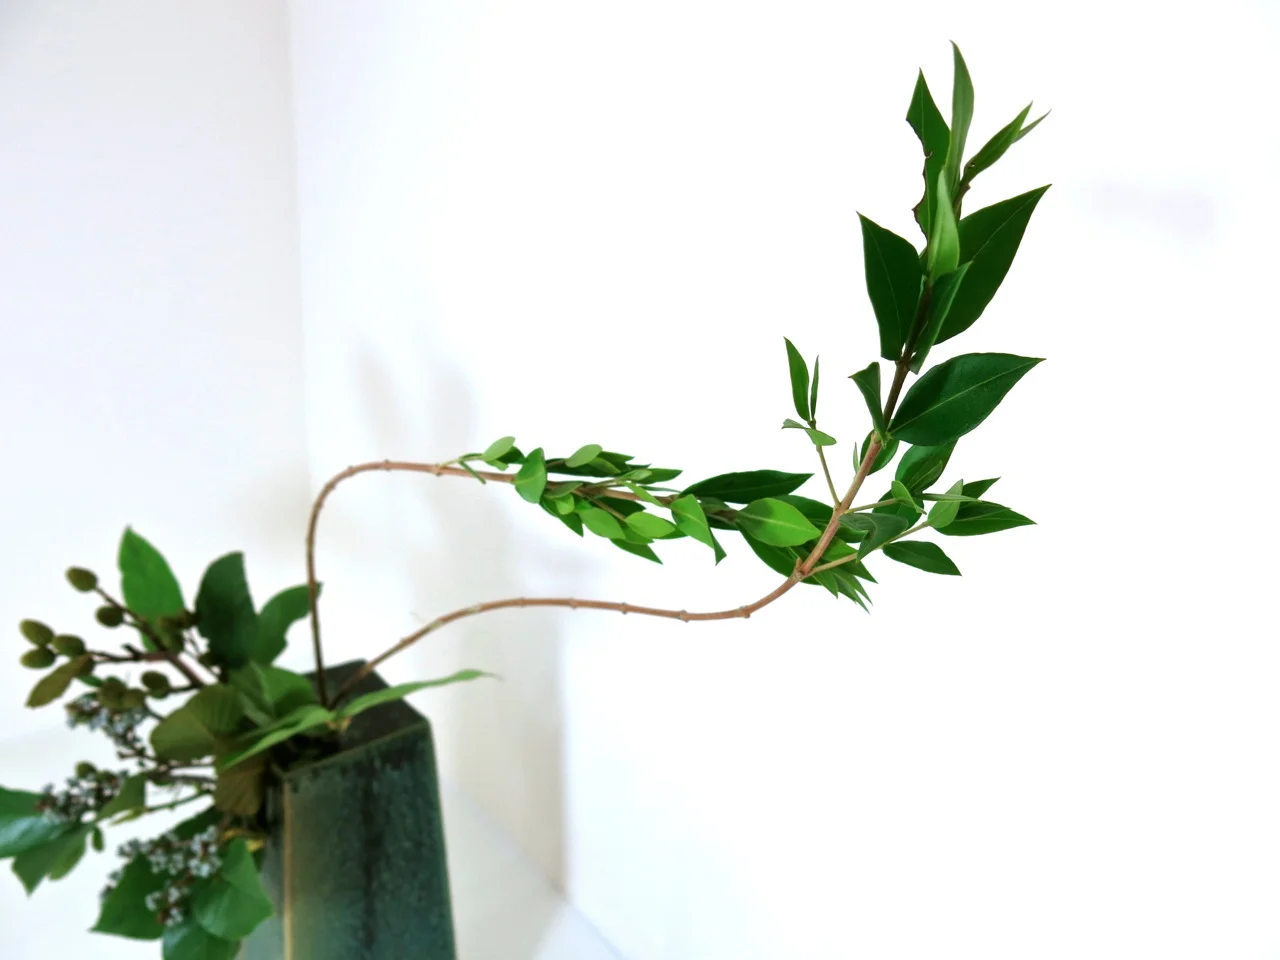
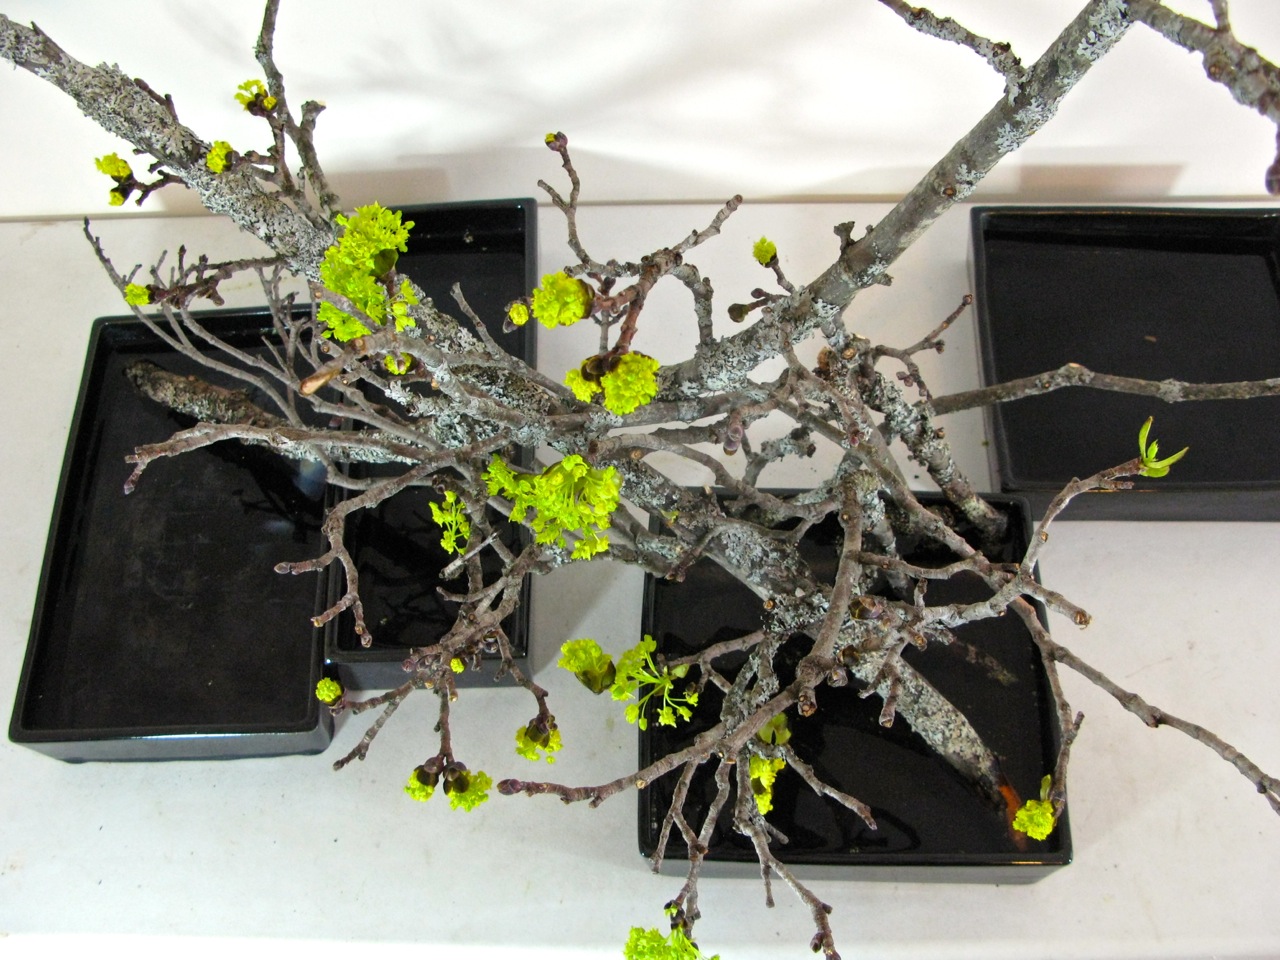
A good expression of contrast between heavy versus light!  Here is the whole arrangement.

IMG_0207.jpg

Another angle.

IMG_0211.jpg

I hope you like it.  -- Miyako

(All photos by the ikebana shop.  All rights reserved.) 

Mini Exhibit At The Biscuit Eater

Added on by the ikebana shop.

The Biscuit Eater is a cozy café and bookshop in Mahone Bay, NS.   

IMG_9087.jpg
IMG_9085.jpg

They were kind enough to host a mini exhibit for us!  So last Thursday (July 18th) Miyako and Susan (Miyako's student) worked all morning to set it up.


Photo courtesy of Susan R.

Photo courtesy of Susan R.

This arrangement, a combination of 3 containers, greets guests as they enter the café .

IMG_9101.jpg

Inside, there are little spaces that allow for smaller arrangements.  The window sills are especially bright and cheery!

IMG_9111.jpg
IMG_9120.jpg

The one on the left uses a teapot as container!  The round yellow container on the right hides among square and triangle shapes! (Accidentally reminiscent of Zen master Sengai's work: The Universe!)

IMG_9118.jpg
IMG_9108.jpg

The space along the hallway that connects the two sitting rooms allows us a taller arrangement.  The arrangement on the right is for ladies only.  Ladies, make sure you visit the WC! :-)

IMG_9114.jpg
Photo courtesy of Susan R. 

Photo courtesy of Susan R. 

...and up close. 

Photo courtesy of Susan R. 

Photo courtesy of Susan R. 

After all the work, a sumptuous lunch!  This is the Greek Isles Plate: hummus, kalamata olives, warm pita, cucumber, tomato, romaine lettuce and feta cheese. 

Photo courtesy of Susan R.

Photo courtesy of Susan R.

The people who made this possible: (L-R) Cara, owner of The Biscuit Eater, Susan and Miyako. 

IMG_9135.jpg

The mini exhibit will be in place up to at least Sunday (July 21st) or, if the flowers are still holding up, even later the following week.   

We will have an ikebana workshop also at The Biscuit Eater on July 31st, Wednesday.  You can sign up at the café or by email/phone directly to us. 


Photos by the ikebana shop and Susan Robertson.  All rights reserved. 

My Ikebana With Sensei: Roots

Added on by the ikebana shop.

It's been a few years since I last set foot in my sensei's studio in Tokyo.  It was comforting to find myself in the familiar room but I was also thrilled to see many new additions to sensei's collection of flower containers.  Sensei is also a potter and she creates many of her vases!

I chose a jug-shaped vase for this day. 

P6290123.jpg

There were a lot of dried branches, driftwood and bamboo available but what caught my eye were these dried roots!

P6290124.jpg

For my flowers, sensei prepared roses and small chrysanthemums...plus nandina, horsetail and forsythia branches. 

P6290128.jpg

The challenge was in creating the framework with the container and the roots.

P6290126.jpg

Then came the flowers and branches.  I had envisioned a "solid" arrangement so I did not add much height.  I used the forsythia branches to extend the arrangement horizontally.

P6290148.jpg

I hope you like it. 

I cherish the moments that I can spend with my sensei. I learn many things even by simply being in the room with her.   --Miyako


(All photos by the ikebana shop.  All rights reserved.) 

Flowers At ALIA

Added on by the ikebana shop.

Last month we had the privilege to create some floral arrangements at the ALIA (Authentic Leadership In Action) Summer Institute. 

This was the reception table. 

IMG_8812.jpg

The hosta and rhododendron leaves were generous gifts from a friend's garden! 

P6140021.jpg
IMG_8836.jpg

Here is the arrangement on the main stage.

IMG_8818.jpg

We were lucky to have a friend accompany us to a spot where trees were being pruned.  Many beautiful branches were to be had!

IMG_8822.jpg
P6140039.jpg

This was how the main seminar room was laid out. 

IMG_8840.jpg

Another arrangement for the Dining Hall. 

IMG_8831.jpg

The pine was from our backyard! 

P6140025.jpg
IMG_8834.jpg

And some small arrangements for each of the dining tables. 

IMG_8827.jpg
IMG_8828.jpg

And one more... 

IMG_8824.jpg

All photos by the ikebana shop.  All rights reserved. 

My Ikebana: Contrast

Added on by the ikebana shop.

This time, I brought out this black-and-white glass vase.  I remember purchasing it because I was drawn to the contrast.​

IMG_8549.jpg

​I had in my hands two different colours of chrysanthemums, which I thought would look good against something black.  I decided to use the mums as "colour" rather than as "flower".  I placed them on the black side of the vase.

IMG_8546.jpg

​The yellow and pink against black stood out clearly enough...but, there was something lacking on the white side of the vase.  I wanted to show contrast (as the vase dictated) but the yellow and pink against white was not strong enough.  So, I placed dark purple statice in the middle to intensify the difference in space. The statice were made to look like the blooms were overflowing from the vase.

The next question was how to make use of the space on the white side. I needed lines to complement the mass on the black side. I stripped myrtle branches of all their leaves and fashioned them into circular shapes.

IMG_8547 - Version 2.jpg

Black side = mass.  White side = line.  

IMG_8553.jpg

Back view: did you notice my little eryngium helpers? :-)

IMG_8552.jpg

​Here is the complete arrangement.  I hope you like it. --Miyako

IMG_8545.jpg

(All photos by the ikebana shop.  All rights reserved.)

My Ikebana: Maple Lines

Added on by the ikebana shop.

In our parking area, there is a maple tree. Close to its trunk, there are many new maple branches sprouting, probably from seeds that have fallen from the mother tree. I decided to use some of them.

IMG_8438.jpg

​The little buds and young leaves were a breath of new life of spring.

IMG_8391.jpg

This arrangement is all about showing lines.  Most of them were very straight branches.  But there were at least some that curved a bit...or some that bent with a little "encouragement"!  I chose a container that showed a strong surface to contrast against the lines.  

I wish I could take a three-dimensional picture.  It is not easy to express the depth on a flat photograph!​

IMG_8396.jpg

Here is the complete arrangement.

IMG_8406.jpg

​Hope you like it.  --Miyako

(All photos by the ikebana shop.  All rights reserved.)

My Ikebana: Only Branches

Added on by the ikebana shop.

After a particularly strong snowstorm last winter, I picked up some branches that had fallen off a maple tree.  I kept them until now.​  

IMG_8127.jpg

Finally, long winter is over and we start to smell the earth, the grass and the trees again.  The branches have started to flower!

IMG_8129.jpg

​For this arrangement, just the branches were enough.  I decided to make isshu-ike (arrangement with one type of material only).  No more flowers.  And since the branches were quite thick, no kenzan either.

IMG_8125.jpg

​I did not have an appropriate container that could match the strength and heaviness of the branches.  So I decided to use 4 containers.  I used two of them simply to enlarge the space and showed only water.

IMG_8126.jpg

​Here is the whole arrangement.  I had fun making this!  Hope you like it.  --Miyako

IMG_8123.jpg

(All photos by the ikebana shop.  All rights reserved.)

My Ikebana: Pussywillow And Water

Added on by the ikebana shop.

I was so excited to find these long pussywillow branches that I did not even think to choose what kind of container to use.  My mind simply started imagining what I could create with these branches.

IMG_8062.jpg

​The branches felt good in my hands.  I bent, twisted and coaxed them to form different shapes and angles.  I was playing and having a lot of fun!  Before long, I had an objet in front of me.

IMG_8016.jpg

​Next, the container.  The work turned out to be quite big so I decided to use a combination of two suiban containers.  The pussywillow branches went to the first container.  I did not want to cover the lines so I used very sparse flowers.

IMG_8021.jpg
IMG_8013.jpg

​I used the second suiban to show water.  I let some alstroemeria blossoms float to show a flow from one container to the other.

IMG_8012.jpg

​The image of hana-ikada was in my mind.  (花筏 hana-ikada = literally "flower raft".  This term is used to describe sakura petals that fall in a pond or river.) 

IMG_0791.jpg

​Here is the full arrangement.

20130404 miyako.jpg

​I hope you like it.  --Miyako

(All photos by the ikebana shop.  All rights reserved.)

My Ikebana: Natural Style

Added on by the ikebana shop.

This time I made an arrangement in a more orthodox and natural style.​

IMG_7846.jpg

​Last week, a customer came to the shop bringing a big branch.  She said she had found it on the sidewalk.  She knew I loved getting branches!  It was that branch that I used for this arrangement.  Thank you very much!

IMG_7852.jpg

​I used red carnations, white pom pom mums and a sprinkling of pine.

IMG_7847.jpg

​See the buds?  The branches were holding out the promise of spring!

IMG_7849.jpg

​Here is the complete arrangement.  I imagined it would be appropriate at an entrance lobby of a restaurant or ryokan (Japanese style inn).

20130322 Miyako.jpg

We put it in our shop instead!  :-)  Sorry but we don't have a lot of space these days so it had to be together with some other things!​

IMG_7853.jpg

I hope you like it.  --Miyako

(All photos by the ikebana shop.  All rights reserved.)

My Ikebana: Pine Needles

Added on by the ikebana shop.

The back of our house has a lot of pine trees.  The previous night's rainstorm gave me a gift of a fallen pine branch.

​Back at the studio, I stood for a long time in front of the flower container shelves but found it difficult to choose a container.  In the end, I decided not to use a container...rather, I re-discovered this piece of driftwood that had been set aside many months ago!

​I also abandoned the idea of using the big pine branch.  The needles had caught my eye.

​I rearranged them to form a mass.  I thought it'd be interesting to set it on the driftwood to look as if moss had started growing on it.  Then, I added the pine twigs (already stripped of their needles) on to the end to show movement, giving the mass of needles a lighter tone.

​Here is the arrangement...

​I hope you like it.  --Miyako

(All photos by the ikebana shop.  All rights reserved.)